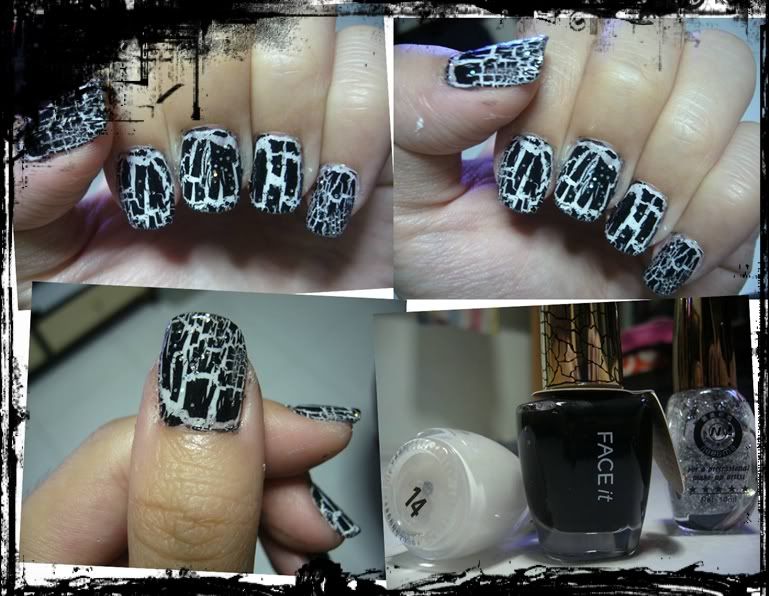
Happened to chance upon this newly introduced crack nail polish at Faceshop one fine day while shopping for a friend's birthday gift. In the end, i couldn't resist the temptation not to get one for myself. It was love at first sight in fact. The sales assistant offered to try it out on one of my fingers to show me the effect. It was plain awesome when the black nail polish cracks instantly after you apply.

Cool isn't it? Is that your style?
The above design was done up using three different nail polish colours. Firstly, i applied the white nail polish as a base coat. (Note: Without the base coat, the crack nail polish will not be able to crack. That's how interesting it is!) Next, is to apply the second layer over the base coat, in which, my black crack nail polish. The last step is to give it a matte finish by applying a transparent glittery polish colour. As easy as that!
Of course you can also try applying other base colours like GOLD, RED....etc. It might turn out nice, who knows! So, HAPPY D-I-Ying!
This is my first attempt in D-I-Ying, well but definitely not my last. In fact, I've just purchased a menicure deal with deb. It's going to be cool experiencing 3D nail art and tip extension. All just for the price of 25SGD after the discount. Thinking of doing it after exams as the validity period is till December. I guess I'll probably do it when nearing my 21st party. Anticipating 3D Nail Art!
That's for now.


No comments:
Post a Comment